Time of First Breeding
Use the Time of First Breeding page to examine your herd's monthly breeding statistics at the time of first insemination. Click Filters at the top left of the page
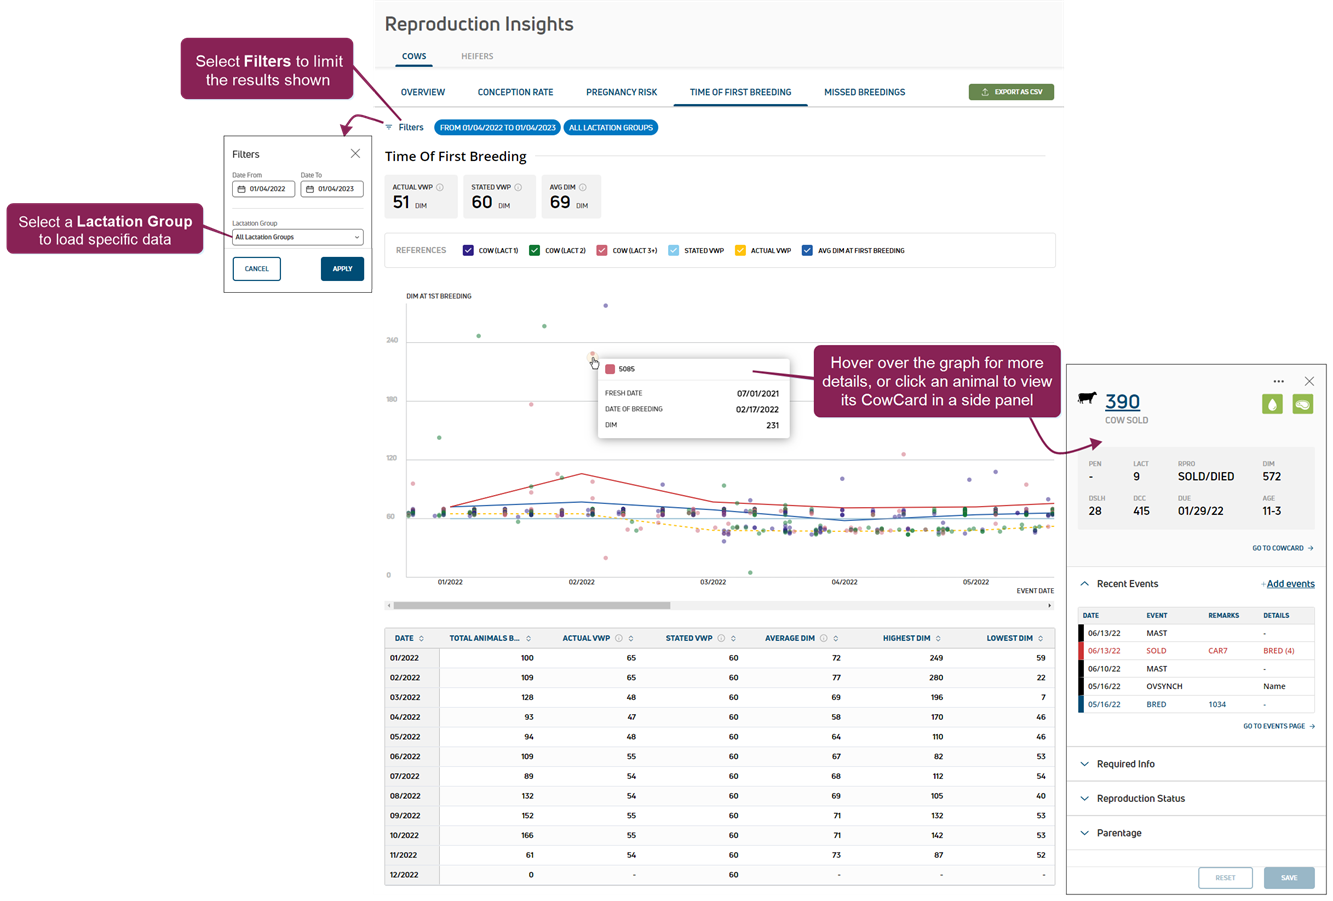
The gray box
- Actual VWP
 Voluntary wait period, or the number of days a dairy chooses not to breed a cow after calving.: The number of days after calving before a cow Days in milk for cows or age for heifers. The actual VWP is a calculated value based on the 5th percentile of breedings over 14 months of breeding data.
 - Stated VWP: The number of days that should pass before another reproductive event is entered for cows based on your dairy's standard voluntary wait period policy.
For heifers, the minimum age before entering a BRED event based on your dairy's minimum age for heifer breeding converted to days.
The Stated VWP and the Actual VWP allow you to see if your breeding program is deviating from your dairy's standard policy.
- AVG DIM/Age: The average DIM for cows. For heifers, the age in days at first insemination based on the average age at first breeding.
The graphed data helps to visualize your herd's monthly breeding statistics:
- References: Each reference is color-coded to match a specific bar or line on the graph. Uncheck a box to remove a plot line from the graph.
- Hover over an animal's data point on the graph to view additional details. Or, click the animal's data point on the graph to open a side panel and view even more details about the animal, including recent events. See View Animal Details to learn more about the information displayed in the side panel.
- Darker data points on the graph indicate that more than one animal is plotted at the same point.
- Scroll down to view the graphed data in a table format.
![]() at the top right of the page to save the data as a CSV file. If you applied filter(s), the data will print with the current filter(s) applied.
at the top right of the page to save the data as a CSV file. If you applied filter(s), the data will print with the current filter(s) applied.